
Photo by Team TGM
Website owners lose valuable leads daily due to spam overwhelming their contact forms. Your Webflow contact form reCAPTCHA protection can stop 99% of automated spam while keeping real visitors happy. This guide shows you exactly how to set up Google reCAPTCHA in Webflow without technical headaches. Unlike other tutorials that skip crucial steps, we cover everything from getting your Google keys to troubleshooting common issues that break your forms.
Table of Content:
You built a beautiful Webflow website and added a contact form to connect with potential customers. But then reality hits – your inbox gets flooded with spam from bots selling everything from SEO services to suspicious business proposals.
Webflow supports CAPTCHA systems via the reCAPTCHA field, which asks site visitors to identify themselves as human before submitting a form, making it the perfect solution for protecting your forms. Studies show that websites without spam protection can receive up to 90% fake submissions, wasting your time and potentially causing you to miss real inquiries.
Why Do You Need reCAPTCHA for Your Webflow Contact Form?
Your contact form is essentially an open door to your business. Without proper protection, spam bots can submit hundreds of fake messages daily. Not only do these unwanted messages fill up your inbox, but they also make it hard to find and respond to real leads.
The spam problem has gotten worse over recent years. As of Monday January 23rd, we have received reports of customers experiencing increased spam and ransomware emails arising from form submissions, according to Webflow’s own support team.
Here’s what happens without contact form spam protection:
- Your response time to real customers increases
- Important leads get buried in spam
- Your email reputation can suffer
- You waste time manually filtering messages
- Professional credibility takes a hit
What Type of reCAPTCHA Should You Use in Webflow?
As of 2025, Webflow only supports ReCAPTCHA v2 (Checkbox) by default. This is the version where users confirm they are not a robot by checking a box. While Google offers reCAPTCHA v3 (invisible) and other versions, Webflow reCAPTCHA integration works best with v2.
reCAPTCHA v2 advantages in Webflow:
- Native support without custom code
- Clear visual feedback for users
- Reliable spam blocking
- Easy setup and maintenance
- Mobile-friendly design
The checkbox version strikes the perfect balance between security and user experience. Most visitors don’t mind clicking a simple checkbox to prove they’re human.
It covers forms, popups, tables, and more!
Prerequisites Before You Start
Before we jump into building the form, make sure you have:
- A published Webflow website
- A basic contact form (or be ready to add one)
- A Google account to generate reCAPTCHA keys
Step-by-Step: How to Add a Contact Form in Webflow
Step 1: Add a Contact Form to Your Page

- Go to your Webflow Designer.
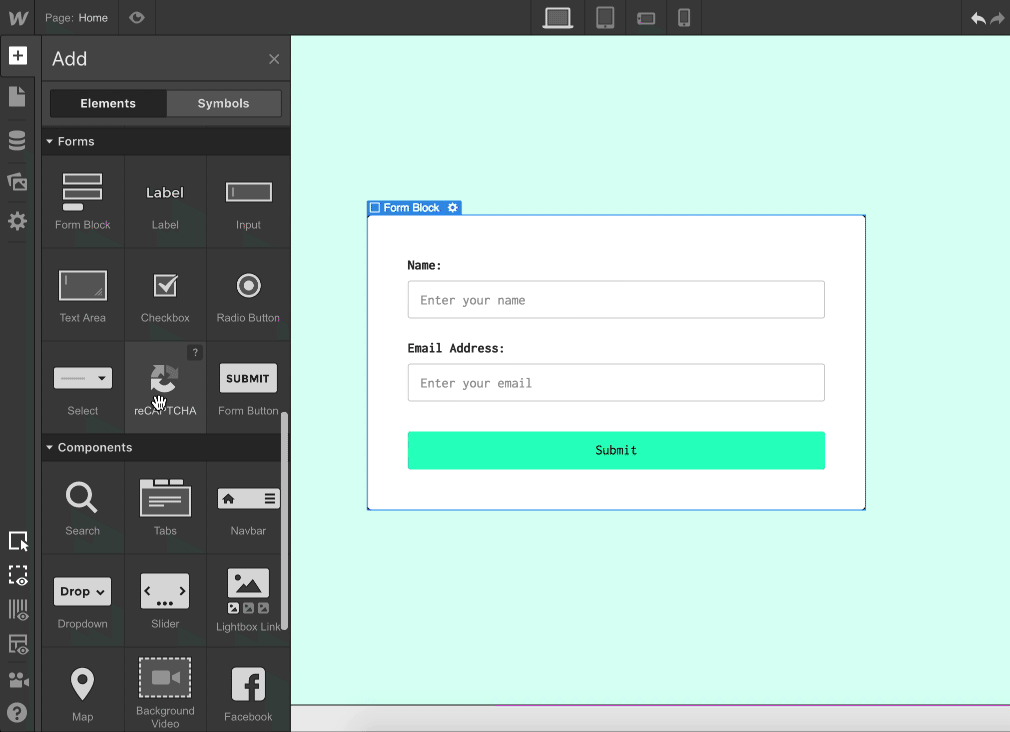
- From the Add Panel (A), drag and drop the Form Block element onto your page.
- Inside the form, you’ll see default fields like Name, Email, and Message. You can customize or style them however you like using the Style Panel.
- Optional: Add dropdowns, checkboxes, or file upload fields as needed.
Once your form looks the way you want, it’s time to secure it.
Step-by-Step: How to Add reCAPTCHA to Webflow
Step 2: Register Your Site with Google reCAPTCHA
- Go to the Google reCAPTCHA admin console.
- Log in with your Google account.
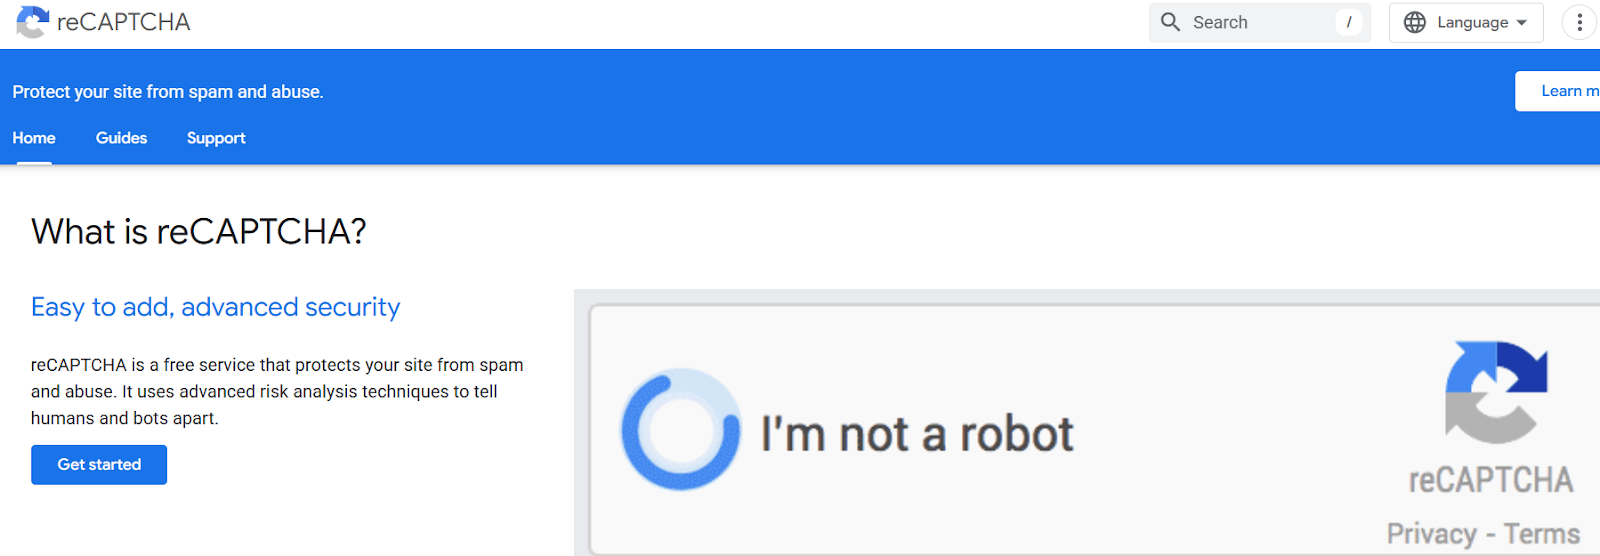
- Choose reCAPTCHA v2 and select “I’m not a robot” Checkbox.
- Enter your domain name (e.g., yourwebsite.com).
- Accept terms and submit.
- You’ll receive two keys:
- Site Key
- Secret Key
Keep these handy—we’ll use them in the next step.
Step 3: Add reCAPTCHA to Your Webflow Project
- In Webflow Designer, go to your form block.
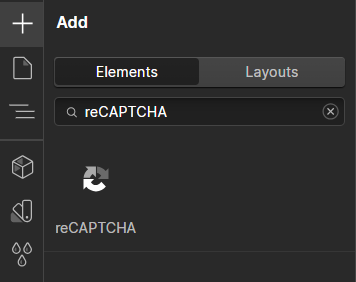
- From the Add Panel, drag in the reCAPTCHA element (under Form Elements).
- Now go to your Project Settings → Forms tab.
- Scroll down to reCAPTCHA settings, and paste your Site Key.
Don’t forget to Save Changes.
Step 4: Add the Secret Key
- Still in Project Settings, go to the Integrations tab.
- Find the reCAPTCHA Secret Key field and paste the Secret Key you got from Google.
- Save and publish your site again.
Done!
How Do You Test Your reCAPTCHA Protection?
Testing ensures your Webflow form security works correctly before real visitors use it.
Testing Steps:
- Visit your published website (not the Webflow preview)
- Fill out your contact form completely
- Look for the reCAPTCHA checkbox to appear
- Check the box and submit the form
- Verify you receive the submission in your email
What to Check:
- reCAPTCHA checkbox displays properly
- Form won’t submit without checking the box
- You receive email notifications
- Success message shows after submission
We recommend you test submitting form(s) on your published site after enabling reCAPTCHA validation to catch any issues early.
What Are Common reCAPTCHA Issues and Solutions?
Even with careful setup, you might encounter some Webflow reCAPTCHA troubleshooting situations:
“Error: Invalid site key” Message: The “Error: Invalid site key” warning appears when 1 or both API keys are incorrect in your Site settings. Double-check that you copied the site key correctly into the Forms tab.
“Invalid domain for site key” Error: This happens when your domain doesn’t match what you registered with Google. Verify your domain spelling in the Google reCAPTCHA console matches your website exactly.
reCAPTCHA Not Showing: Make sure you’ve added the site key in the Forms tab and included the reCAPTCHA element in your form. Also confirm you’ve published your site after making changes.
Form Still Accepts Spam: If your Webflow form’s submission URL (aka form handler) has already been identified by bots, implementing reCAPTCHA alone may not be sufficient. Consider combining reCAPTCHA with Webflow’s built-in spam filtering or bot blocking features.
Mobile Display Issues: Add the attribute data-size=”compact” to your ReCAPTCHA element for better mobile viewing.
Conclusion
Adding a contact form to your Webflow site is easy—but securing it with Google reCAPTCHA is even smarter. In just a few steps, you can protect your form from bots and spam without hurting the user experience.
And once your form is working perfectly, you can take things further—connect it to Zapier, build email automations with Mailchimp, or even filter form data with Airtable.
Keep exploring, keep growing—and let your Webflow site do the work for you.
-
Yes, but v2 (checkbox) is easier to use and more beginner-friendly. v3 requires score checking with custom logic


")
