
Photo by Team TGM
Imagine this: You’ve just got a great idea for a social-media post—maybe for Instagram or Facebook. The clock’s ticking because you need it done “yesterday”. But instead of spending hours fiddling with templates, fonts, resizing, and hunting for the right image… you hit a few prompts, let AI generate the base, tweak a bit, and boom—you’ve got a polished post ready to go in minutes. Sound good
That’s exactly what using Canva’s AI tools (inside the suite called Magic Studio by Canva) lets you do. In this article, I’ll walk you through how to use Canva AI to create social media posts faster, even if you’re not a designer. You’ll get step-by-step instructions, time-saving hacks, and real-world examples so you can hit “publish” with confidence.
Table of Content:
What is Canva AI / Magic Studio?
Before we dive into posting, let’s get clear on what we’re working with. Canva’s AI set includes features under Magic Studio that let you:
- Generate designs from text prompts.
- Edit images fast (background removal, replace object, expand canvas) with AI.
- Resize or reformat posts across multiple social-platforms in one click.
- Generate images from text (text-to-image) inside Canva.
This means you’re not starting from scratch—you’re letting AI give you a head-start, and you do the finishing touches. It’s speed + creativity.
Why Use Canva AI for Social Media Posts?
Here are the key benefits that matter when you want to move fast:
-
-
-
- Time-saving: Instead of manually placing elements, choosing stocks, resizing, etc., many tasks are handled automatically.
- Consistency: If you maintain brand colours/fonts, AI helps apply them across posts without repeating the same manual steps.
- Quality: You’re able to use design best-practices (via templates + AI assistance) even if you don’t have design training.
- Versatility: Need the same post in Instagram square, Facebook story size, LinkedIn banner? AI tools in Canva let you reshape quickly.
Pro Tip: Keep a “brand kit” in Canva (your colours, fonts, logo) so every AI-generated design already aligns with your look.
-
-
Step-by-Step: Create a Social Media Post With Canva AI
Here’s a workflow you can follow (takes ~10–15 minutes once you’re familiar):
Step 1: Define your post goal size
Start with: What’s this post for? Instagram grid? Story? Facebook post? Set the correct dimensions (Canva has presets).
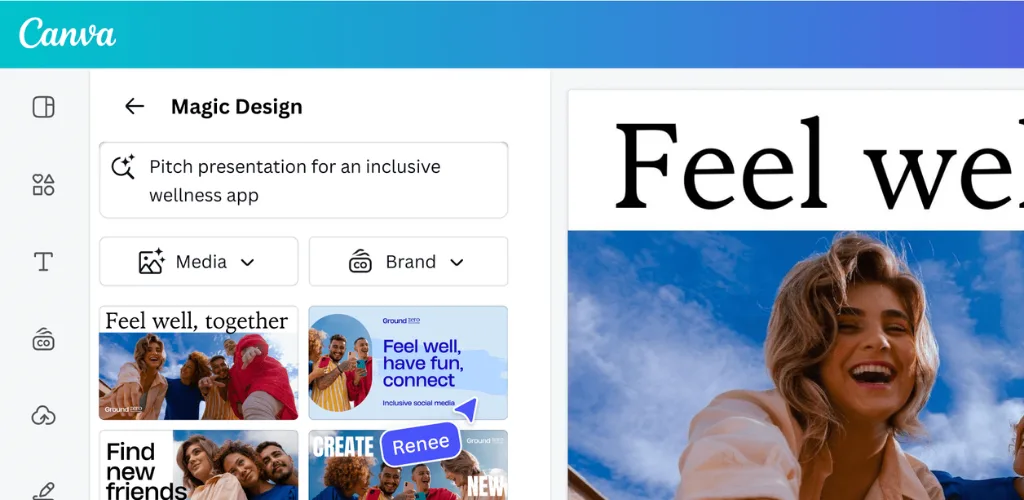
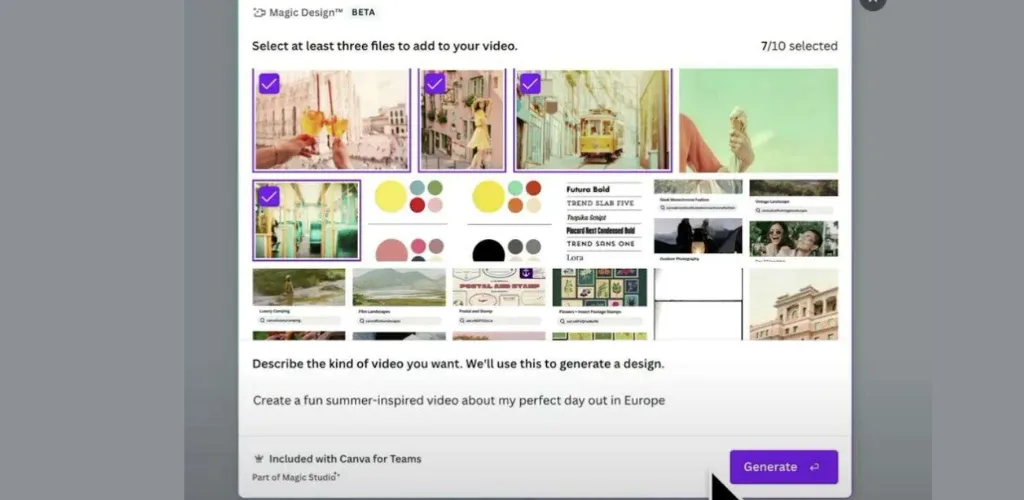
Step 2: Use Magic Design or a template prompt
In Canva choose “Magic Design” (or search templates) and provide a prompt like:
“Create an Instagram post about ‘Summer Sale 50% off’ in vibrant colours with palm-leaf background.”
AI will generate a few ready versions.
Step 3: Edit for your brand
- Replace colours/fonts with your brand kit.
- Swap the text, update the offer or call-to-action.
- Use AI-photo editing: remove background from your photo, or refine image with “Magic Edit”.
Step 4: Resize for other platforms
Use the “Resize” or Magic Switch to convert the same design into multiple formats (story, banner, etc).
Step 5: Final check + download/share
Ensure text is readable, image elements are balanced, mobile view is good. Then download (PNG, JPG) or schedule directly from Canva.
4. Best Canva AI Tools for Social Media (and How to Use Them)
| Tool | What it does | How you can use it for social posts |
| Magic Design | Generates full designs from a prompt. | For fast post creation—a post for product launch, an announcement, etc. |
| Magic Edit / Background Remover | Edit images: remove background, replace object, expand image. | Upload your product photo → remove background → place into your template. |
| Text-to-Image (Magic Media) | Generate images based on your text prompts. | Create custom visuals instead of stock images—makes your posts unique. |
| Resize / Magic Switch | Convert one design into many formats. | For campaigns across Instagram, Facebook, LinkedIn—save time. |
5. Common Mistakes How to Avoid Them
- Mistake: Using generic AI prompts → results look stock-y.
Fix: Be specific in your prompt (style, colour, mood). - Mistake: Forgetting mobile readability.
Fix: Always preview on mobile size—social posts are mostly viewed on phones. - Mistake: Ignoring brand consistency.
Fix: Use Brand Kit in Canva; apply it every time. - Mistake: Skipping alt-text or captions.
Fix: When posting, include descriptive captions, tags, alt-text for accessibility and SEO.
When You Should Use Canva AI vs When Manual Design is Better
Use Canva AI when:
- You need to create multiple social posts quickly.
- You don’t have a dedicated designer and you want decent quality fast.
- You need to repurpose content across platforms.
Use manual design when:
- You have a high-stakes campaign that needs custom assets, animation, or heavy branding.
- You’re working with a designer team and want full control over every element.
- You need highly unique visuals or effects that AI tools can’t yet provide reliably.
- Pro Tip: Combine both—use AI for draft/volume work, and manual design for “hero” pieces.
Metrics Tracking: How to Know It Worked
After publishing your AI-powered social posts, check:
- Engagement rate (likes/comments/shares) versus earlier posts.
- Time saved in creation (track how long the process took).
Conversion or click-through if applicable (for links/CTAs).
If you see similar or better results and saved time, the workflow is validating itself.
Final Thoughts
Using Canva AI doesn’t mean you stop being creative—it means you create smarter. You’ll get more done, maintain quality, and let the tech handle the repetitive parts. If you consistently follow the steps above, you’ll be able to publish social media posts faster, better, and with less stress.
Remember: The best tool is the one you’ll use. And with Canva AI, you’re just a few clicks away from your next great post.
-
Some AI features (like text-to-image, advanced editing) are locked to the paid version. For full access to Magic Studio you’ll often need Pro.


")